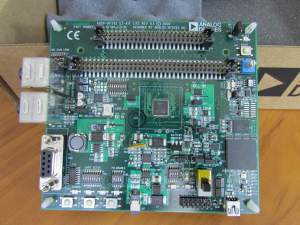
The ADSP-BF592 EZ Lite is one of the many things that has been sitting on my shelf for months awaiting review. It has been about 8 month since this board shipped to all RoadTesters by Element14. RoadTest is a program sponsored by Element 14 that promotes real product reviews by real people. Reviewing such a board is rather time-consuming as this is a professional development tool, not your common Arduino or other AVR microcontroller toy. This is probably the reason why nobody else has submitted a RoadTest review yet either.
Because of this fact, I decided to keep this review a bit on the entry level by giving step-by-step instructions on how to set up the IDE and program the board. However, the most important rule for working with a product like this is RTFM[1].
Overview and Tech Specs
Here are the tech specs as provided by ADI:
- Analog Devices ADSP-BF592 Blackfin processor [2]
- Core performance up to 400 MHz / 800 MMACs
- 64-lead (9 mm × 9 mm) LFCSP package
- Two 16-bit MACs, two 40-bit ALUs, four 8-bit video ALUs,
40-bit shifter - RISC-like register and instruction model for ease of
programming and compiler-friendly support - 68K bytes of core-accessible memory
- 64K byte L1 instruction ROM
- Flexible booting options from internal L1 ROM and SPI memory or from host devices including SPI, PPI, and UART
- Four 32-bit timers/counters, three with PWM support
- 2 dual-channel, full-duplex synchronous serial ports (SPORT), supporting eight stereo I2S channels
- 2 serial peripheral interface (SPI) compatible ports
- Parallel peripheral interface (PPI), supporting ITU-R 656
video data formats - 2-wire interface (TWI) controller
- Event handler with 28 interrupt inputs
- 32 general-purpose I/Os (GPIOs), with programmable
hysteresis - Debug/JTAG interface
- On-chip PLL capable of frequency multiplication
- Analog Devices AD5258 TWI digital potentiometer
- Analog Devices ADP1715 low dropout linear regulator
- On-board hardware debugger
- Battery interface with on-board battery charger
- 16 MB external SPI flash memory
- Audio codec
- Analog Devices SSM2603 stereo, 24-bit analog-to-digital and digital-to-analog converter
- Highly efficient headphone amplifier
- 3.5 mm Line In/Out, headphone and microphone jacks
- Universal asynchronous receiver/transmitter (UART)
- ADM3202 RS-232 line driver/receiver
- DB9 female connector
Sounds like plenty of horsepower to play with. The stereo ADC/DAC including 3.5 mm jacks makes this board an easy entry point for people wanting to learn how to implement real-time audio effects using DSP technology.
Unboxing
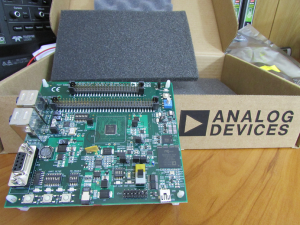
As usual with ADI products, the board comes well-protected in a large protective foam filled box. The box is supposed to contain a CD with software, but in my case, it didn’t (See: Software Installation).
If you have absolutely no experience with programming Blackfin DSPs, I highly recommend that you download all the documentation available from ADI. ADI generally does a really good job at supplying high quality documentation. For practical reasons, however, they often split documentation relating to one product over several different individual documents. I highly recommend reading the ADSP-BF592 EZ-KIT Lite Evaluation System Manual and for beginners the document labelled Getting Started With Blackfin Processors. Both are available from ADI’s website [ 3].
Software Installation
At the time this product was shipped to me, it was supposed to come with a 90-day trial version of VisualDSP++. However, it didn’t. I contacted ADI and was informed that VisualDSP++ is, despite still being supported, no longer recommended for new designs. They shipped me the missing VisualDSP++ ASAP and also provided me with a full license of the recommended CrossCore Embedded Studio for review purposes. Special thanks to ADI’s Bob Olson and Denis Labrecque for handling this request within less than a few hours.
I’m not sure if newer versions of the BF592 EZ-Kit Lite will be shipped with CrossCore or not. In any case, you can get a trial version of CrossCore can be obtained from ADI’s website.
CrossCore Embedded Studio uses Eclipse, a multi-language Integrated Development Environment (IDE), as workspace. Every serious programmer will come in touch with Eclipse sooner or later. Therefore, I personally find it very comforting to be able to use the familiar Eclipse workspace and not having to learn yet another IDE.
Example Programs
In order to access the ADI-provided code examples, it is necessary to install the ADSP-BF592 EZ-KIT Lite® Board Suppport Package [4].
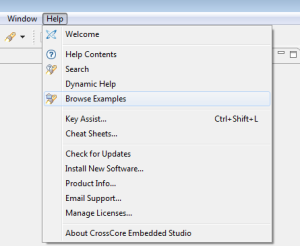
Once installed, the demo projects are available through the Help -> Browse Examples menu.
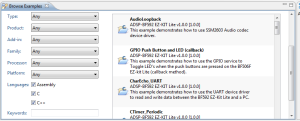
A list of samples will show up and all one needs to do to load the sample code is to double click on the example. That’s it.
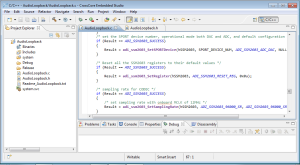
The first program I tried was the Audio Loopback example project. This program basically copies the ADC values straight into the DAC. There is absolutely no processing on the DSP side involved. Just a plain memcopy().
If you just want to test the program real quick, simply connect the board via USB to the PC, build the entire project and use the On-Board debugger to run the program on the target environment. The next section will describe how to burn a program into the permanent brain of the board.
Programming the Board
Programming the board requires quite a bit of pioneering. Even though there are a lot of references to programming in the datasheets and auxiliary documentation, there’s not a single functioning example to be found anywhere.
After a while of reading the documentation, I designed myself a little batch file that would take a compiled .dxe file as argument and program it to the ADSP-BF592 EZ Lite Kit via USB.
Here’s the code:
elfloader %1 -b flash -f hex -width 16 -dmawidth 8 -init "C:\Analog Devices\CrossCore Embedded Studio 1.0.2\Blackfin\ldr\ezkitBF592_initcode_ROM-V02.dxe" -o Outfile.ldr -si-revision 0.2 -proc ADSP-BF592-A
cldp -proc ADSP-BF592-A -emu KIT -driver "C:\Analog Devices\ADSP-BF592_EZKIT-Rel1.0.0\BF592_EZ-Kit_Lite\Blackfin\Examples\Device_Programmer\serial\bf592_m25p16_dpia.dxe" -cmd prog -erase affected -format hex -file Outfile.ldr
del Outfile.ldr
Make sure you change the file path for the init-code and the device programmer driver if they differ on your system. Also change “-si-revision 0.2” if your silicone revision is different from 0.2.
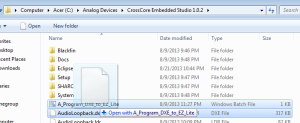
Save the code as a .bat file and place it in a convenient spot on your hard drive. If all the path settings are correct, simply drag the .dxe file you wish to program to the BF592 onto the .bat file and watch the magic happen.
This approach works but it’s a little unfortunate that ADI didn’t integrate the programmer option in the IDE. Since it’s based on Eclipse, I imagine it wouldn’t be too difficult to write a plug-in by yourself if needed.
I highly recommend this board to anyone trying to get into DSP programming. It may take you a while to get into it but the time investment will definitely pay off.
Links and Sources:
[1] Wikipedia, RTFM: http://en.wikipedia.org/
[2] ADI, ADSP-BF592 Datasheet: http://www.analog.com/
[3] ADI, BF592 EZ-Kit Lite: http://analog.com
[4] ADI, CCES sample code: http://download.analog.com
Westerhold, S. (2013), "Review: ADSP-BF592 EZ Lite Kit". Baltic Lab High Frequency Projects Blog. ISSN (Online): 2751-8140., https://baltic-lab.com/2013/08/review-adsp-bf592-ez-lite-kit/, (accessed: January 29, 2026).
- Conducted Emissions on the Bench: Implementing the CISPR 25 Voltage Method - December 15, 2025
- WebP-Images without Plugin - January 14, 2025
- Firewall Rules with (dynamic) DNS Hostname - January 14, 2025
