The FRDM-KL25Z “Freedom” development platform is an extremely inexpensive development board with a Kinetis KL2 Family 32-bit ARM®CortexTM-M0+ MCU [1]. The Kinetis L-Series MCUs promise true 32-bit performance at the price and power consumption of an 8- or 16-bit MCU.
Freescale and I tried to travel in time and present this review before the official launch last Tuesday. However, it turns out that the snail mail is not yet compatible with time travel. But the board is finally here, so let’s do it!
Please note that I am using a pre-production board for this review and the actual production board may slightly differ from this one.
Overview and Tech Specs
Before we jump right into the review, let’s have a look at the key features of the Freedom (FRDM-KL25Z) development kit. The board comes with a KL25Z128VLK4 MCU. The KL25Z128VLK4 is a Kinetis KL2 Family 32-bit ARM®CortexTM-M0+ MCU with quite a bit horsepower for such a small board. Here are the tech specs for the development board:
- KL25Z128VLK4, Freescale’s ARM Cortex-M0+ based Kinetis L-Series MCU with:
- 128 KB Flash
- 16 KB SRAM
- 64 B Cache
- Maximum CPU Frequency: 48 MHz
- Real Time Clock (RTC)
- Watchdog
- 4 Channel DMA
- 12-bit DAC
- Analog Comparator (6 inputs)
- USB full-speed controller
- Low Power UART
- 2 x UART
- Capacitive Touch Sensor (16 Channels)
- 66 GPIOs
- 23 GPIOs with Interrupt
- OpenSDA–sophisticated USB debug interface
- Tri-color LED
- Capacitive touch “slider”
- Freescale MMA8451Q accelerometer
- Flexible power supply options
- Power from either on-board USB connector
- Coin cell battery holder (optional population option)
- 5V-9V Vin from optional IO header
- 5V provided to optional IO header
- 3.3V to or from optional IO header
- Reset button
- Expansion IO form factor accepts peripherals designed for Arduino™-compatible hardware
The FRDM-KL25Z evaluation board can be pre-ordered from Newark and is advertised for an incredibly low price of just ![Rendered by QuickLaTeX.com 12.95 [<a href="http://www.newark.com/freescale-semiconductor/frdm-kl25z/eval-brd-kinetis-kl25z-freescale/dp/28W5033?Ntt=28W5033&COM=freedompage_knode" target="_blank">2</a>]. The microcontroller itself is available for](https://baltic-lab.com/wp-content/ql-cache/quicklatex.com-3ca1ee5f8df9f16417600ce9c2df2027_l3.png) 3.85 [3]per piece from the same distributor. I personally hope that Expansion IO for Arduino™-compatible hardware will convince some Arduino / AVR-fans that the jump to a 32-bit ARM architecture is not at all out of their league.
3.85 [3]per piece from the same distributor. I personally hope that Expansion IO for Arduino™-compatible hardware will convince some Arduino / AVR-fans that the jump to a 32-bit ARM architecture is not at all out of their league.
Unboxing
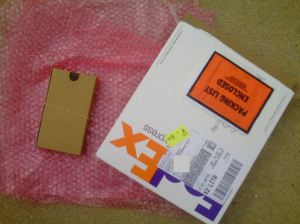
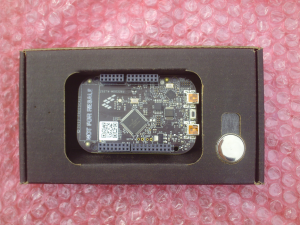
My board came in a pre-production packaging and is therefore not representative for the production units. However, here are a few pictures:
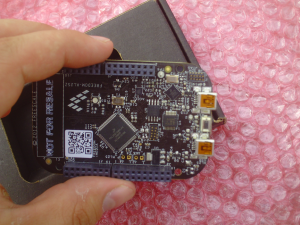
The board is really compact. A little bit larger than a credit card, maybe. On the left side are the two USB Mini-B type connectors. The top one is connected to the MCU and the bottom one is used to flash the MCU and for the OpenSDA, a sophisticated USB debug interface. The expansion header seen here on the top and the bottom of the picture is not installed on the currently shipping development boards.
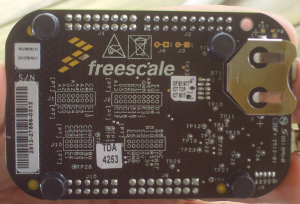
Just like the expansion IO header, the CR2032 battery holder in the top right corner is not installed in the KL25Z version currently shipped by the distributors. I heard several people complain about this but I only partially agree. If you really need the battery holder and the IO header, go ahead and order the parts together with the board from your manufacturer. You will have to solder them in yourself but it should only take a minute.
Software Installation
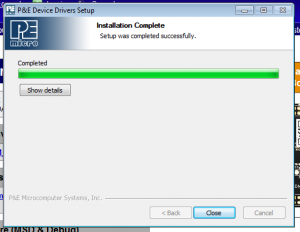
Before we can connect our hardware, we need to download and install the >Windows USB Driver OpenSDA Support< from P&E Micro Systems v11_120720 or later. The software is available for free and without an annoying registration form [4].
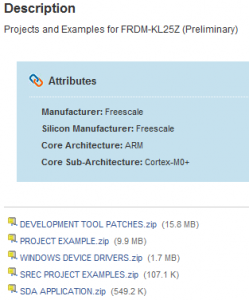
Next, there’s a bunch of files on the element 14 server that will be needed sooner or later. I recommend downloading all the files and extracting them to a known location. The files are available from [5] after registration and log-in.
The >WINDOWS DEVICE DRIVERS.zip (1.7 MB)< contains the Windows drivers that Windows might ask for when the board is connected to the PC for the first time.
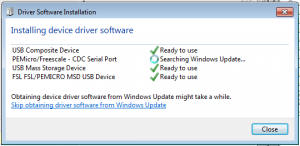
When the board is connected to the PC for the first time (2nd USB connector, bottom left), the “Windows Driver Installation” dialog will pop up and attempt to install 4 devices. A USB Composite Device, a USB Mass Storage Device and a Freescale MSD USB Device (which should all install automatically) and an OpenSDA – CDC Serial Port (requires driver). The installation of the OpenSDA – CDC Serial Port will require a driver from the >WINDOWS DEVICE DRIVERS.zip (1.7 MB)< file. Just tell Windows the location of the extracted files and let the PC pick the right file(s). The driver for the OpenSDA – CDC Serial Port is also available on the board itself.
Programming the Microcontroller
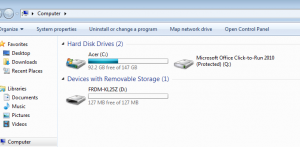
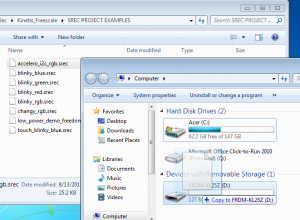
The Freescale FRDM-KL25Z development board comes pre-programmed with a very nifty OpenSDA MSD Flash Programmer application. This piece of software is simply awesome. When the board is being connected to the PC using the OpenSDA USB port, the device will act like an external USB drive. The drive will identify itself as “FRDM-KL25Z”.
In order to transfer a program to the MCU, all one needs to do is copy the corresponding S-record file (.s19 or .srec) “FRDM-KL25Z” drive. That is all! No special software, no hidden secrets, nothing.
Example Programs
The files mentioned in the software section contain numerous different demo programs. To try them, simply copy the .srec file of the demo program onto the FRDM-KL25Z board as described above.
Here’s a short YouTube clip I shot using the demo programs >changy_rgb.srec< and >accellero_i2c_rgb.srec<:
Links and Sources:
[1] Kinetis KL2 Family, Freescale http://www.freescale.com/
[2] FRDM-KL25Z – EVAL BRD, Newark http://www.newark.com/
[3] MKL25Z128VLK4 MCU, Newark http://www.newark.com/
[4] OpenSDA Support, P&E Micro Systems http://www.pemicro.com/
[5] Element 14 Freedom Community http://www.element14.com
Westerhold, S. (2012), "Review: Freescale FRDM-KL25Z development platform for Kinetis L-Series MCUs". Baltic Lab High Frequency Projects Blog. ISSN (Online): 2751-8140., https://baltic-lab.com/2012/09/exclusive-review-freescale-frdm-kl25z-development-platform-for-kinetis-l-series-mcus/, (accessed: December 15, 2025).
- Conducted Emissions on the Bench: Implementing the CISPR 25 Voltage Method - December 15, 2025
- WebP-Images without Plugin - January 14, 2025
- Firewall Rules with (dynamic) DNS Hostname - January 14, 2025
Erich Styger
For pre-orders of the board, element14 is packaging the headers, but not all parts.
See http://mcuoneclipse.wordpress.com/2012/09/28/kl25z-freedom-board-and-arduino-headers/
Erich
KF5OBS
Erich, thank you for your feedback. Please note that the original Arduino headers are single row I/O headers with 100 mil / 2.54 mm spacing. The KL25Z has more I/Os than the normal Arduino header configuration can carry. Therefore, freescale is using a double row, industry standard 100 mil / 2.54 mm I/O header to allow easy use off all I/Os of the KL25Z.
Where this second row becomes a problem, it might be practical to only install a single row I/O header.
The battery holder and I/O headers are not supposed to be included in the currently shipped version of the freedom board. While they would of course be a nice extra, you have already experienced yourself that it might be practical to use different headers for different applications.
pragatheeswaran
i need a sample program for freescale kl25z..i am keill s.w
pragatheeswaran
where can i download sample program for freedom FRDM KL25Z128 board..
Right now using keil-mdk version…
please any one help me
KF5OBS
Download the file named >>PROJECT EXAMPLE.zip<< from link number 5 (bottom of the article). The file contains examples for IAR and Keil.
MaxsimGoratiev
Where would I get a battery holder that fits this board?
Erich Styger
See http://mcuoneclipse.com/2012/10/23/completing-the-frdm-kl25z-board/ with order numbers of all parts.